This Project is Suitable for Everyone Including student and Professionals
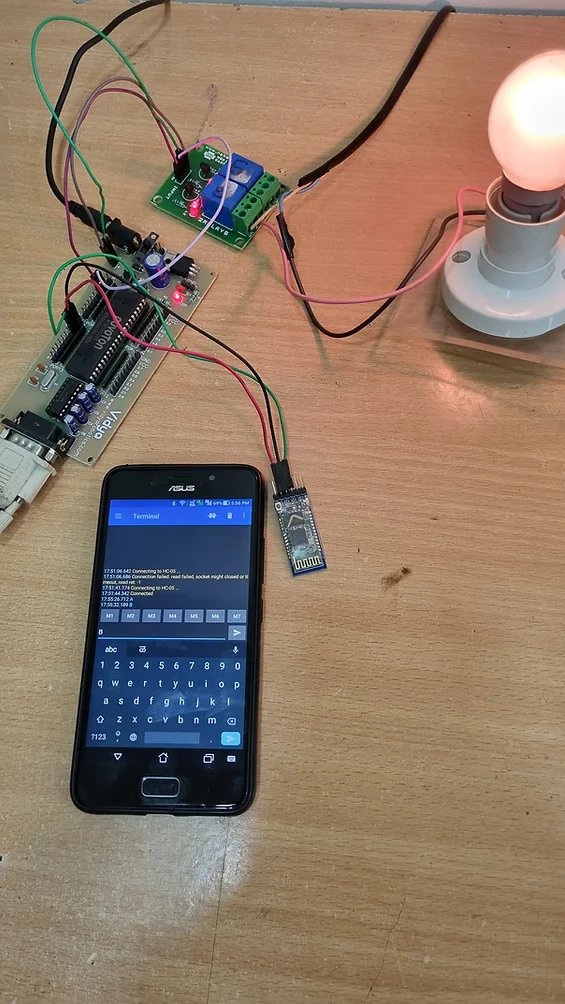
Bluetooth-based relay control using an 8051-based microcontroller involves using Bluetooth communication to remotely control the switching of a relay. Here’s a general overview of the system:
- Hardware components:
- 8051-based microcontroller board
- HC-05 Bluetooth module
- Relay board
- Power supply
- AC Bulb 230v
- Bulb Holder
- Android based Mobile phone
- Connections:
- The HC-05 module is connected to the microcontroller’s serial port pins.
- The relay board is connected to the microcontroller’s output pins.
- Power supply connections are made to power the microcontroller and the relay board.
- Software:
The software for this system involves two main parts:
- Code for the microcontroller to receive commands from the Bluetooth module and switch the relay on or off accordingly.
- An Android application to send Bluetooth commands to the HC-05 module.
- Operation:
- The Android application sends Bluetooth commands to the HC-05 module.
- The HC-05 module receives the commands and sends them to the microcontroller.
- The microcontroller interprets the commands and switches the relay on or off based on the command received.
Overall, this system provides a wireless means of controlling a relay, which can be useful for a variety of applications, such as home automation or industrial control systems.
#include<reg51.h>
sbit X = P1^0;      // connect relay1 to P1.0
sbit Y = P1^1;      // connect relay2 to P1.1

void delay(unsigned int count)
{
    unsigned int i;
    while(count)
    {
        i = 115;
        while(i > 0)
        i--;
        count--;
    }
}
/*
Uart initialization function, call this function by passing a valid baud rate value to initialize UART
currently Supported Baud Rates are 9600,4800,2400,1200
*/
void uart_init(unsigned int baud)
{
    unsigned int a = 9600, b = 4800, c = 2400 , d = 1200;

    TMOD = 0x20;    // timer 1 8-bit auto-reload
    SCON = 0x50;    // Tx and Rx enable

    if(baud == a)
    {
        TL1 = 0xFD;
        TH1 = 0xFD;
    }
    if(baud == b)
    {
        TL1 = 0xFA;
        TH1 = 0xFA;
    }
    if(baud == c)
    {
        TL1 = 0xF4;
        TH1 = 0xF4;
    }
    if(baud == d)
    {
        TL1 = 0xE8;
        TH1 = 0xE8;
    }

    TR1 = 1;        // Start timer
}

/*~~~~~~~~~~~~~~~~~~~~~~~~~~~~~~~~
    Trasmitting 8 bit data
Send 8-bit data while callinjg this function
to send it over UART
~~~~~~~~~~~~~~~~~~~~~~~~~~~~~~~~*/

void uart_write(unsigned char value)
{
    SBUF = value;
    while(!TI);
    TI = 0;
}

/*~~~~~~~~~~~~~~~~~~~~~~~~~~~~~~~~
    Receiving 8-bit data
~~~~~~~~~~~~~~~~~~~~~~~~~~~~~~~~*/

char uart_read()
{
    while(!RI);
    RI = 0;
    return(SBUF);
}

/*~~~~~~~~~~~~~~~~~~~~~~~~~~~~~~~~
    Xmitting String
~~~~~~~~~~~~~~~~~~~~~~~~~~~~~~~~*/

void uart_write_text(char *str)
{
    unsigned char i=0;
    while(str[i])
        uart_write(str[i++]);
}


/*~~~~~~~~~~~~~~~~~~~~~~~~~~~~~~~~
    Read a particular number of bytes in a string
~~~~~~~~~~~~~~~~~~~~~~~~~~~~~~~~*/
void uart_read_text(void *buff, unsigned int len)
{
    unsigned int i;
    for(i=0;i<len;i++)
    {
        ((char*)buff)[i]=uart_read();
    }
}

/*~~~~~~~~~~~~~~~~~~~~~~~~~~~~~~~~
    Echoing received data
~~~~~~~~~~~~~~~~~~~~~~~~~~~~~~~~*/
void uart_echo()
{
    uart_write(uart_read());
}


void main()
{
    unsigned char byte;
  uart_init(9600);

    //P2 = 0x00;

     X=0;
     Y=0;

    delay(100);
    uart_write_text("Welcome");
    while(1)
    {
          byte = uart_read();           // receive a byte serially, wait 1 second and again send it back
            if(byte == 'A')
            {
                X = 1;
            }
            if(byte == 'a')
            {
                X = 0;
            }
            if(byte == 'B')
            {
                Y = 1;
            }
            if(byte == 'b')
            {
                Y = 0;
            }

          delay(100);                       //  little delay so that user can recognize it
          uart_write(byte);             // resend received data over UART

    }
}
for more learning of Python Raspbery Pi, Internet of things , ESP 32 ,and Arduino click on courses
