o make Fire Alarm system you will need the following components:
●Arduino board (Uno or Nano)
●Infrared sensor module (e.g. KY-026)
●Buzzer module
●LED module
●Jumper wires
●Breadboard
●220-ohm resistor
Once you have all the necessary components, you can follow these steps:
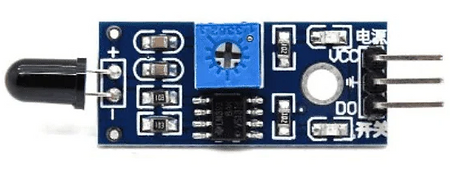
Step 1: Connect the infrared sensor to the Arduino board
●Connect the VCC pin of the infrared sensor to the 5V pin on the Arduino.
●Connect the GND pin of the infrared sensor to the GND pin on the Arduino.
●Connect the OUT pin of the infrared sensor to any digital pin on the Arduino (e.g. pin 2).
Step 2: Connect the buzzer and LED modules to the Arduino board
●Connect the positive (longer) leg of the LED module to pin 12 on the Arduino through a 220-ohm resistor.
●Connect the negative (shorter) leg of the LED module to GND on the Arduino.
●Connect the positive (+) and negative (-) pins of the buzzer module to pins 11 and GND on the Arduino, respectively.

Step 3: Write the Arduino code
●Open the Arduino IDE and create a new sketch.
write code
const int infraredSensorPin = 2;
const int buzzerPin = 11;
const int ledPin = 12;

void setup() {
  pinMode(infraredSensorPin, INPUT);
  pinMode(buzzerPin, OUTPUT);
  pinMode(ledPin, OUTPUT);
  Serial.begin(9600);
}

void loop() {
  int fire = digitalRead(infraredSensorPin);
  if (fire == HIGH) {
    digitalWrite(ledPin, HIGH);
    digitalWrite(buzzerPin, HIGH);
    Serial.println("Fire detected!");
    delay(1000);
  } else {
    digitalWrite(ledPin, LOW);
    digitalWrite(buzzerPin, LOW);
  }
}
Arduino code
Save the sketch and upload it to the Arduino board.
Step 4: Test the fire alarm
●Place the infrared sensor near a heat source (e.g. a lighter or a candle).
●Once the sensor detects the heat, the LED module and buzzer module will turn on, and the message “Fire detected!” will be printed on the Serial Monitor.
To turn off the alarm, move the heat source away from the infrared sensor
