Step 1: List of Components
You’ll need the following components:
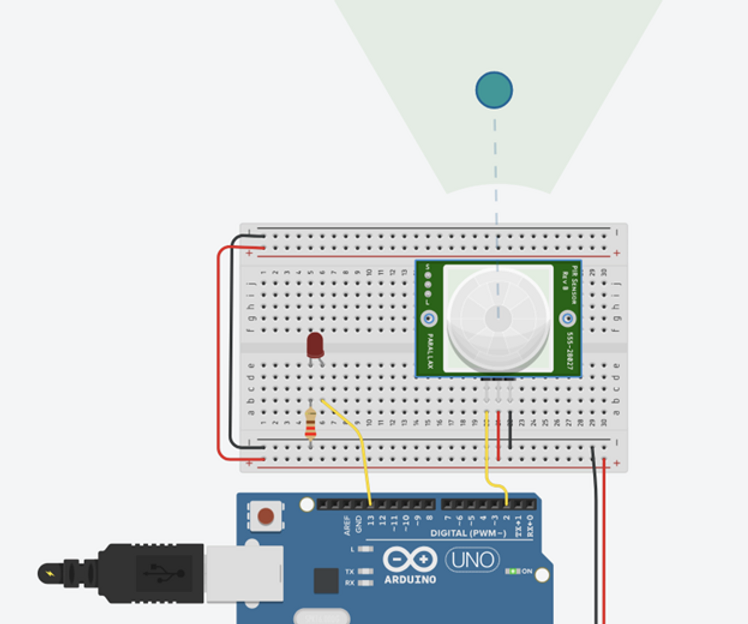
● Arduino board (e.g. Arduino Uno) ● PIR sensor ● Jumper wires ● Breadboard (optional)

Step 3: Code
int pirPin = 2;    // choose the pin for the PIR sensor
int ledPin = 13;   // choose the pin for the LED
int pirState = LOW; // we start, assuming no motion detected
int val = 0;       // variable for reading the pin status

void setup() {
  pinMode(ledPin, OUTPUT);  // declare LED as output
  pinMode(pirPin, INPUT);   // declare sensor as input
  Serial.begin(9600);
}

void loop(){
  val = digitalRead(pirPin);  // read sensor value
  if (val == HIGH) {          // check if the sensor is HIGH
    digitalWrite(ledPin, HIGH);  // turn LED ON
    if (pirState == LOW) {
      // we have just turned on
     Serial.println("Motion detected!");
      pirState = HIGH;
    }
  } else {
    digitalWrite(ledPin, LOW); // turn LED OFF
    if (pirState == HIGH){
      // we have just turned off
     Serial.println("Motion ended!");
      pirState = LOW;
    }
  }
  delay(100); // short delay between readings
}
Open the Arduino IDE and create a new sketch. Paste the following code: This code will turn on an LED when motion is detected by the PIR sensor, and print a message to the Serial Monitor in the Arduino IDE. You can modify the code to do something else when motion is detected, like triggering an alarm or sending an alert.
Step 4: Upload and Test
Connect your Arduino board to your computer and upload the code. Open the Serial Monitor in the Arduino IDE to see the messages printed when motion is detected. Move around in front of the PIR sensor to test it out.

