
What is Raspberry Pi?
We’ve all heard about raspberry pi, haven’t we? But there are many questions in every hobbyist and engineers mind about raspberry pi, for example
- What is exactly raspberry Pi?
- Why raspberry pi is used for?
- Is raspberry pi a processor/micro controller/ OS?
- I’ve bought a raspberry pi, whats next??
- And Most importantly, Shall I learn raspberry PI?
In this tutorial, we’ll try to answer most of these questions. We will discuss raspberry pi and how to get started and using the Raspberry Pi board. We’ll cover everything that needs to be done to start experimenting with Raspberry Pi
So first of all, Raspberry Pi is the name given to a computer Board which was designed in the UK by the Raspberry Pi foundation. The whole idea behind raspberry pi computer development was to enable each and every school in the world to afford to have a computer in their lab. We know that personal computers have evolved a lot in past few decades, but the price of a minimum computer system which can be used is still much costly and not every single individual can afford it. So Raspberry Pi was developed so that “schools” can afford it. And not only schools but any individual should be able to afford it. They achieved this by offering a complete computer that can run Linux operating system at a price of 35 USD. And you might get as much information as you need from the official raspeberry pi website here
So let’s get down to what this tutorial is about, and that is installing the operating system on raspberry pi. As it’s clear that raspberry pi is a computer and not a microcontroller, its obvious that it can install operating systems just like we do install on our computers. Exactly like you can install ubuntu/windows 10 on your computer, you have a choice of installing one of the may be supported OS’s for your raspberry pi. Raspberry Pi has the number of different supported Operating systems including the raspberry pi foundation’s own Raspbian. Some of the most popular operating systems for raspberry pi are
Raspbian
Ubuntu Mate, a media center OS
OpenELEC, again a media center
RetroPi, retro gaming supported OS
Windows 10 IoT Core
Additionally there’s also an interesting Linux distribution called Kali which is used in digital forensics. More about Kali linux can be read from this interesting tutorial here
while all of these operating systems have their own use cases, we always recommend using raspbian to any new developer/student who is just having hands on the raspberry pi computer. All the projects we do here at kitflix, we use only raspbian because it’s simple, lightweight and most importantly, it’s official. So let’s see how you can install Raspbian into your operating system.
Step 1 Download the OS
If you go to the website address here or https://www.raspberrypi.org/downloads/
You can see that raspbian is available to download in 2 formats
- NOOBS, new out of the box software, a compressed archive file
- Raspbian, a bin file
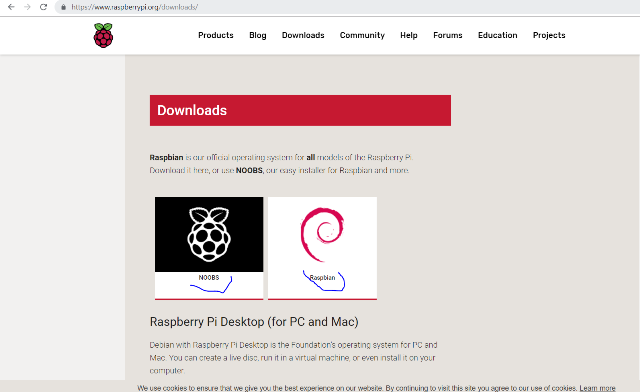
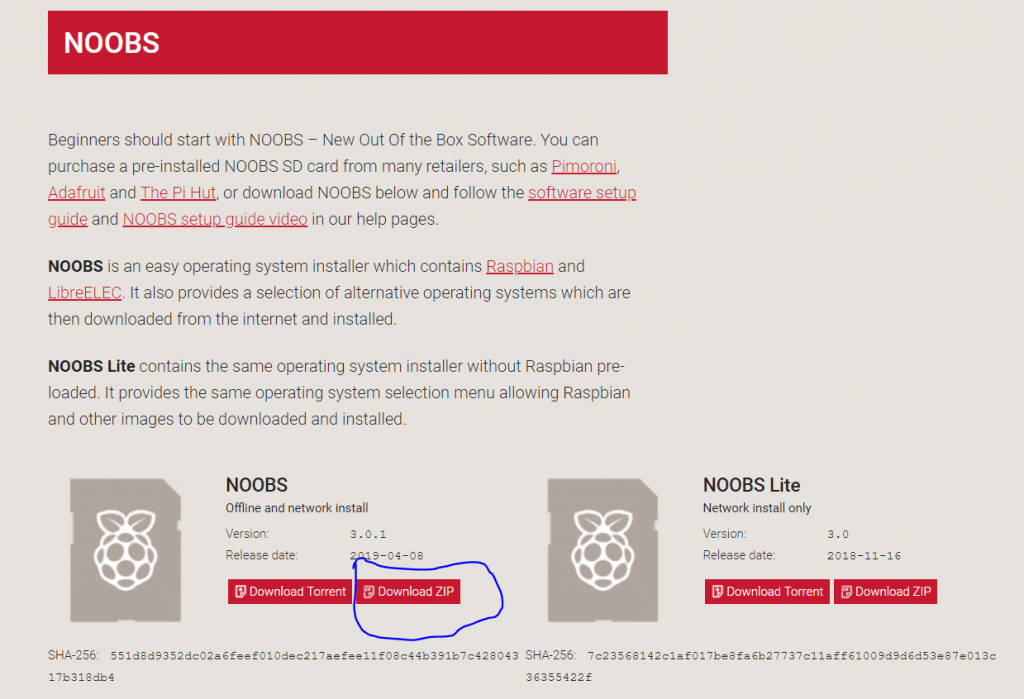
For all those who are just getting started with raspberry pi, I’d prefer using the NOOBS, it’s basically an installer which assists in the entire installation process of a raspberry pi. So download the package by clicking on NOOBS. Once you click on NOOBS, you’ll see 2 options for downloading, I’d say just stick to NOOBS instead of NOOBS Lite if you’re just getting started. So start downloading NOOBS for raspberry pi.
Once you download the package somewhere in your system, you’ll get a simple .zip file.

Basically zip file means a compressed version of lots of file combined together to make it easier to download or upload from the internet. So when you download the zip file, you need to extract it or unpack it and get all the files present inside it. Using a suitable program like Winrar or WinZip, extract the contents of the zip file into a folder.

After extracting the contents of the zip file, you’ll get the contents of the zip file in a folder, see below
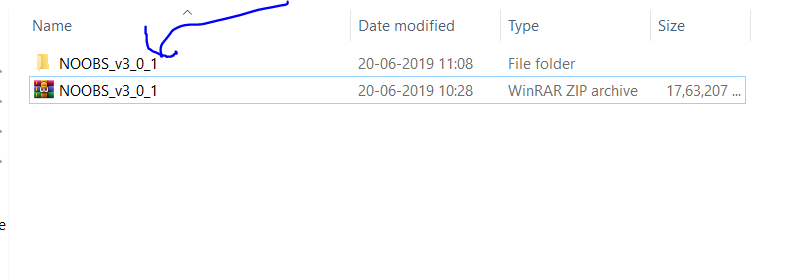
upon opening that folder you can see all the individual files and folders needed for operating system installation for raspberry pi.

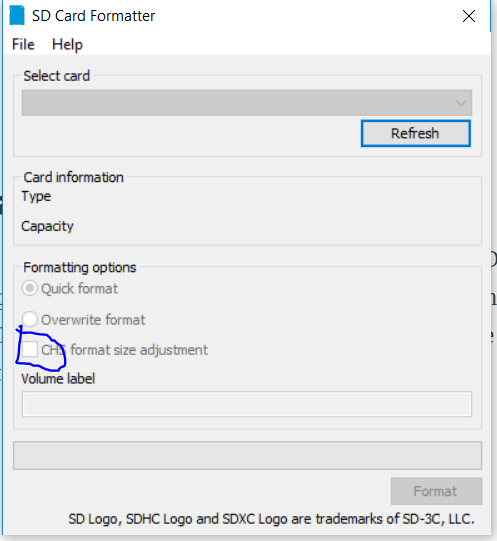
Step 2 Prepare SD Card
The next thing to do is then to copy the contents of this folder to the SD Card and to do it, first you need to prepare the SD Card for your Raspberry Pi. Just take a new SD card and format it using the SD Formatter tool found here. While formatting the SD card make sure to check the options shown below. Make sure you check this button which says “format size adjustment”
Step 3 Copy the Contents to SD Card
As shown in below pics, copy the contents of the folder NOOBS onto the formatted SD Card, make sure that you copy all the files and folders “as is” on to the root location of SD card, and not in any folder as shown below

See below, this is what I mean by saying Root folder of SD Card

Step 4 Raspberry pi setup
Now, its time to insert this SD card onto the raspberry Pi. For booting up raspberry pi, you’ll need below things for the specified purpose
- Raspberry Pi Computer Board
- SD card with copied noobs folder contents as shown above
- HDMI – VGA converter, if you’re having a VGA monitor you wish to use
- HDMI – HDMI cable, if you’re having an HD TV which you want to use
- USB Keyboard and Mouse, or wireless keyboard mouse combo
- +5v micro USB mobile phone charger rated 2 Ampere or more
- Excitement for making new things happen!!!
Step 5 Start installing
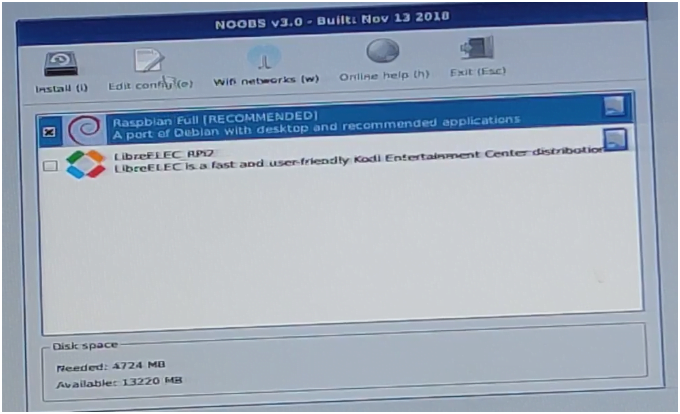
Once you do all the things mentioned above and make their interconnections, power on the raspberry pi and the installation will begin itself. the screen like below comes which shows you the options to choose from. Generally, NOOBS contains one or more operating systems that can be installed on the raspberry pi. Select Raspbian(Recommended) here and depending on which country you live in, accordingly select the keyboard layout here itself. And once done, click install
After this, the installation process will continue itself, and there’s not much you can do with the process itself, all you need to do is either look at a screen for coming 10-15 mins, or grab a coffee for yourself or check your messages meanwhile 🙂
Step 6 Post-installation
Now if all went well including your coffee, the Raspberry pi must have been rebooted and the raspbian operating system will start and a welcome screen like below will be seen. Remember, all the steps henceforth are optional but recommended to make it easier for you to use the raspberry pi
Set the country, in the first step, set the country where you live and the time zone

Next, it’ll ask you to choose a new password. Remember, by default the username and password are
User name: pi
Password: raspberry
in the coming step, it’ll as you to change the password, we personally prefer making the password as “pi”. So our username and pwd both will be “pi”. you can choose anything you want here

Connect to wifi network. In next step, it’ll ask you to connect to a wifi network if one is available.

Done, all steps are done, and now you’re good to start using your fresh new raspberry pi computer

Please refer to below video for understanding the installation steps in detail

Hi,
I’ll keep this short and sweet to make the 34 seconds it takes to read this worth your time (yes, I timed it.)
I saw you recently linked to https://ubuntu-mate.org/ from http://kitflix.com/how-to-setup-raspberry-pi-for-the-first-time-use/.
I hope you could add my link https://www.guru99.com/kali-linux-tutorial.html .
Of course, I don’t want a free from you. I wouldn’t reply to this kind of email if there wasn’t anything for me, so here’s what you can get:
• Social sharing of your article
• You will update the content and we all know Google likes that
• You will make me extremely happy
That’s it. What do you think?
Best,
[Alex]
Sure, I’ve updated the article now and Kali Linux is added in list of OS in the beginning of article